Step-by-Step Guide: Building Your First Gaming PC in India (2025 Beginner-Friendly Edition)
Introduction
Building your own PC isn’t just about assembling parts; it’s about taking control of your performance. Whether you’re a gamer chasing smoother frame rates, a creator tired of slow renders, or a student looking for lasting value, a custom PC lets you decide exactly where your money goes and what your machine can do.
The only catch? It’s easy to get lost in the process. CPU generations, GPU bottlenecks, cooling setups - there’s a lot of noise out there, and most buyers end up paying extra for parts they don’t even need.
That’s where Digibuggy comes in. We simplify the entire journey from helping you choose the right components to letting you build your PC live at our DIY Experience Zone in Nehru Place or online. It’s a hands-on, transparent process that turns confusion into confidence and makes building your dream setup an experience, not a headache.
Why Build Your Own PC Instead of Buying Prebuilt?
Many first-time buyers think prebuilt PCs are safer or easier. But in reality, building your own gives you far more control, value, and flexibility.
Better performance for your money: Prebuilts often include generic parts or weak power supplies hidden behind big brand labels. A custom PC ensures every component from CPU to PSU is chosen for efficiency and real performance.
Easier upgrades: Custom systems are built to evolve. Whether you add more RAM, a stronger GPU, or faster storage, Digibuggy’s configurations stay fully upgradable and future-ready.
Less risk than you think: Modern components are plug-and-play, and Digibuggy’s Free PC Consultation plus DIY Experience Zone make the process guided and stress-free even for beginners.
Step 1: Define Your Purpose and Budget
Before picking any part, clarity is key. Ask yourself what will this PC primarily do?
- Gaming: Focus on a high-performance GPU and CPU combo.
- Content Creation: Prioritise multi-core processors, faster SSDs, and more RAM.
- Productivity or Study Use: Balance efficiency with reliability and silent operation.
Once you define your goal, you can decide how to distribute your budget. A gaming setup, for instance, demands a higher share of your budget in GPU and cooling, while a content creator setup leans towards storage and processing power.
At Digibuggy, we help you plan this balance intelligently, so every rupee goes exactly where it matters most for your workflow.
Step 2: Choose the Right Components
Processor (CPU)
Your CPU dictates your PC’s multitasking strength and responsiveness. Think of it as the “thinking brain.”
A good CPU ensures smooth gameplay, faster rendering, and lag-free daily use.
Look for a processor that balances core count, clock speed, and efficiency, not just raw numbers.
Graphics Card (GPU)
The GPU is the engine that drives visuals and speed in gaming, design, and video editing.
What many don’t realise is that GPU choice should be based not on hype, but on your monitor’s resolution and refresh rate.
For example:
- 1080p gamers can prioritise frame rates.
- 1440p and 4K users should focus on VRAM and cooling.
At Digibuggy’s Experience Zone, you can test live configurations to see how different GPUs perform for your specific needs.
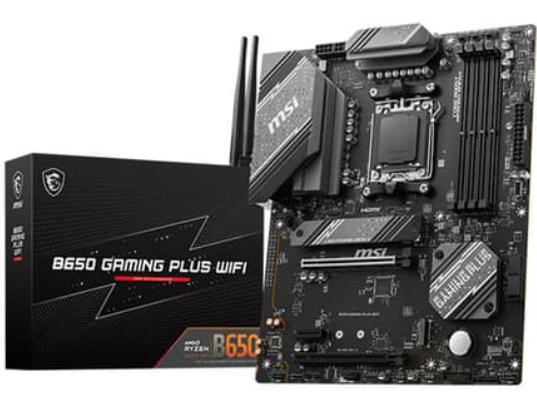
Motherboard
The motherboard decides how well all your components communicate.
Instead of just checking compatibility, consider future-proofing, like whether it supports the latest generation of CPUs, faster SSDs (PCIe Gen 4/5), or built-in Wi-Fi.
A smart motherboard choice saves upgrade costs later.
RAM
RAM affects how many tasks or programs you can handle simultaneously.
While most builds today need at least 16GB, the real insight is to match your RAM speed and channels with your motherboard for optimal performance. Dual-channel configurations (2x8GB) offer noticeably better results than a single stick.
Storage
The biggest mistake new builders make? Ignoring storage type.
SSDs (especially NVMe) are game-changers with faster boot times, instant app launches, and seamless file transfers.
For creative users, pairing a fast SSD (for OS and apps) with a larger HDD (for raw files) offers both speed and capacity.
Power Supply (PSU)
Your PSU quietly powers everything, and often, it’s the most underrated part.
Investing in a reliable, efficient PSU ensures stability and longer component life.
At Digibuggy, every build goes through load testing to ensure power delivery is stable, even under high stress.
Cabinet & Cooling
Aesthetics meet engineering here.
A well-ventilated cabinet keeps temperatures low and performance high.
If you care about looks, RGB setups and tempered-glass panels can be customized to reflect your style, and yes, Digibuggy builds often include clean, cable-managed, theme-based setups.
Step 3: Check Compatibility and Balance
Compatibility isn’t just about fitting parts; it’s about performance synergy.
Even a top-tier GPU can bottleneck if paired with an entry-level CPU.
That’s why Digibuggy’s experts use advanced compatibility tools and years of experience to ensure your build is balanced, efficient, and fully optimised.
If you’re unsure, you can always book a free PC consultation at Digibuggy.com to finalise your build plan before purchasing anything.
Step 4: Assembly – DIY with Expert Support
Assembling a PC isn’t just a technical task; it’s a moment of creation.
At Digibuggy, we’ve turned that moment into a one-of-a-kind experience through India’s first DIY PC Experience Zone.
Here, you can build your own PC live, either in-store at Nehru Place or virtually over a video call, guided step-by-step by Digibuggy experts.
You’ll learn how every part comes together from seating the CPU to perfect cable management while our team ensures your build stays thermally tuned and performance-ready.
But what truly makes it memorable are the small details:
- You receive a time-lapse video of your build.
- A personalised Instagram PC edit featuring your setup.
- And even a Polaroid photo of you with your completed rig like a keepsake of your first (or next) custom build.
Every Digibuggy build, whether DIY or fully assembled by experts, goes through strict testing and optimisation for thermals, acoustics, and BIOS stability, so your system is flawless from day one.
This isn’t just PC assembly.
It’s an experience you’ll remember and a performance you’ll feel every day.
Step 5: Software, Setup, and Testing
Once hardware is complete, it’s time to install:
- The operating system (Windows/Linux)
- GPU and chipset drivers
- Essential utilities and benchmarking tools
Testing your system through benchmarks or live gameplay helps verify that performance matches expectations.
You can even experience this stage live at Digibuggy’s Experience Zone, where we demonstrate builds under real-world workloads.
Step 6: Optimisation and Maintenance
Performance isn’t a one-time achievement; it’s a habit.
To keep your system in peak condition:
- Regularly clean dust filters and fans.
- Keep BIOS and drivers updated.
- Monitor temperatures using software like HWMonitor or Afterburner.
- Schedule periodic maintenance for thermal paste and airflow checks.
Digibuggy customers also receive long-term guidance on upgrades and maintenance to ensure your system stays top-notch for years.
Common Myths About Custom PCs
Myth 1: Custom PCs are only for tech experts.
Modern PC parts are highly user-friendly. Even beginners can build confidently or rely on Digibuggy’s assembly services for a hassle-free experience.
Myth 2: Building a PC is risky.
Every component comes with a warranty, and professional builds include stress testing. At Digibuggy, each system is delivered only after 100% stability verification.
Myth 3: Pre-built PCs are a better value.
Pre-builts often use lower-quality parts hidden behind fancy branding.
Custom PCs give you transparent, brand-specific choices with performance tailored to your exact usage.
Conclusion: Start Your PC Building Journey with Confidence
Building a custom PC isn’t about chasing specs; it’s about crafting a system that fits you.
From selecting components to final performance testing, Digibuggy turns the process into a seamless experience that combines personalisation, performance, and expert support.
Whether you’re a gamer, editor, or first-time builder, we’ve got you covered.
Visit Digibuggy.com or step into our Experience Zone at Nehru Place, Delhi, to explore live builds and start your journey today.
Ready to bring your dream setup to life?
Book your free consultation and get your perfect configuration built, the Digibuggy way.
FAQs: Building Your First Gaming PC in India (2025)
What parts do I need to build a gaming PC?
A gaming PC is built around eight essential components - the CPU, motherboard, RAM, graphics card (GPU), storage, power supply (PSU), case, and cooler. The CPU handles all processing tasks, while the motherboard connects every component. Always use two RAM sticks instead of one for dual-channel performance, which boosts game responsiveness. The GPU drives your frame rates and visual quality, and an NVMe SSD ensures faster boot and load times. A reliable 80+ certified PSU keeps your system stable, and a mesh-front case with good airflow helps manage India’s heat and dust. Finally, install Windows 11 and pair your build with a monitor, keyboard, and mouse to complete your setup. If you’re unsure where to begin, Digibuggy’s free PC consultation helps you select the perfect combination of parts for your budget and performance goals.
How long does it take to build my first PC?
For beginners, expect around 2–3 hours in total, roughly 60–90 minutes for assembly and 30–45 minutes for software and driver setup.
Go slow and be gentle with parts because most mistakes come from rushing or applying too much force.
If you want expert guidance, you can even build your PC live with professionals at Digibuggy’s DIY Experience Zone.
AM4 or AM5 — which should a beginner choose in 2025?
If you’re on a tight budget, go with AM4; it’s mature, stable, and delivers great performance for the price.
If you want a future-ready platform, AM5 is the smarter pick. It supports newer CPUs, DDR5 memory, and longer upgrade options.
Digibuggy can help you compare both platforms during your consultation so you invest wisely.
Is a 550W PSU enough for RX 6600 or RTX 4060 builds?
Yes, a 550W 80+ Bronze PSU from a reliable brand is enough for these mid-range GPUs. If you’re considering a high-end upgrade later, opt for a 650W PSU to keep your system stable and ready for future power needs.
How do I make sure all parts are compatible?
Match your CPU with the right motherboard socket (AM4, AM5, or LGA1700), pick RAM your board supports (DDR4 or DDR5), ensure your GPU fits the case, and choose a PSU with enough wattage and proper cables. If this feels tricky, you can rely on Digibuggy’s experts — they’ll verify every component for you through a free PC consultation, ensuring your build is 100% compatible before you buy.
Do I need a mesh-front case and extra fans in India?
Yes, it’s generally preferred, especially in India’s warm and dusty climate. A mesh-front case allows better airflow, keeping your components cooler and your system quieter. The need for extra fans depends on your setup high-performance GPUs and CPUs generate more heat and benefit from additional cooling. Digibuggy always recommends front intake and rear/top exhaust fans for stable temperatures and smoother long-term performance.